Planting a Native Grass Lawn Step By Step
Follow these basic steps to plant a lawn of native grasses no matter where you live. For more directions that are specific to your area, see the chapters on regional approaches to planting a native lawn. For instance, "Native Grasses for High Desert Landscapes" covers watering during the first year of establishment in the Southwest. For more information on the planting requirements of a particular species, refer to the chapters on specific grasses, such as "Planting and Maintaining a Buffalograss Lawn."
Warm-season grasses need a soil temperature of at least 60°F to germinate, so the best time to plant is late spring or early summer. Cool-season grasses germinate best in fall.

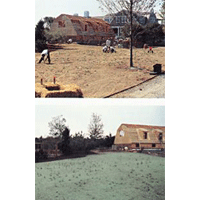
Little bluestem plugs started from seed collected from the wild help maintain some of the local gene pool. At top left, an area is planted with 2-1/4-inch plugs prior to seeding. Below, the area after seeding is complete. (Photos: James C. Grimes)
1. Select the site.
All of the grasses need full sun and a well-drained soil. The sedges (see "Sedge Lawns for Every Landscape"), and some of the fine fescues (see "Low & Slow Fescues") will tolerate partial shade. Measure the site to determine the number of square feet.
2. Buy the seed or plugs.
Seed is available year-round, but it is best to place your order early (in December or January), since suppliers run out of certain varieties. Plugs are usually available only in spring. You'll need 3 pounds of seed per 1,000 square feet—more if you are planting bunchgrasses and want a thick stand right away. If you use plugs, plan on one or two per square foot.
3. Clear the existing vegetation.
Use one or a combination of the following methods: repeat tilling, sodcutting, smothering, or herbicide.
If you use tilling, cultivate two or three times, about a week apart. A sodcutter is a piece of power equipment that you can rent. It strips off the top layer of grass and roots, leaving a nearly weed-free planting area.
Alternatively, you can smother and kill the vegetation by covering it with black plastic, old rugs, or boards. The cover must be in place through an entire growing season.
The recommended herbicides are broad-spectrum, nonpersistent ones, such as glyphosate (Roundup or Ranger). Follow label instructions. It usually takes two to three weeks for all vegetation to die.
4. Assess the soil fertility.
Unless the site is extremely infertile and compacted, no amendments are required. If the soil is heavy and clumps together, spread a two-inch layer of compost and till or mix it in.
5. Rake the area smooth.
Break up all clumps. Reserve some soil from the area in a pile or wheelbarrow to lightly spread over the seeds after they are sown.
6. If you are using plugs, plant them.
If you are using a mixture of plugs and seed, plant plugs first. Space them on 12-inch centers and then scatter seed around them. If you are using only plugs, plant on 6- to 8-inch centers -- two plants per square foot.
7. If you are using seeds, plant them
For small areas (less than 2,000 square feet), mix seed with sand or an inert material, such as peat moss or vermiculite, that has been slightly dampened. For a 1,000-square-foot area, use a bucket that's about the size of a bushel. Hand broadcast half of the bucket's contents over the site by walking in one direction. Then spread the second half, walking in a perpendicular direction. For large areas, use a drill seeder.
Spring seeding favors warm-season grasses and fall-flowering forbs; late-summer seeding favors cool-season grasses and spring-flowering forbs.
8. Rake the surface.
Rake gently to mix in the seed and cover it with soil, only 1/4- to 1/2-inch deep. Broadcast the reserved soil mixture over any spots where the seed is exposed.
9. Roll the area.
This ensures that seeds have firm contact with the soil.
10. Mulch with straw.
Scatter a light layer of chopped, clean, weed-free straw (not hay).
11. Water.
Use a fine sprinkler head, to keep from dislodging the seed or causing runoff.
12. Keep the seedbed moist.
Until seedlings emerge, the seedbed should be moist but not soaked. You may need to water every day or every other day if it doesn't rain. Many factors affect the rate of germination but, in most cases, you should see seedlings in 10 to 15 days. Continue to irrigate through the first year. Once the grasses are established, irrigation will not be necessary.
13. Check the site every day.
Your grass seedlings will have long, thin leaf blades. If you see any broadleaf weeds—plants with rounded leaves -- pull them immediately.
14. Control weeds by hand pulling when they first emerge.
If weeds are too close to a grass seedling to pull without disturbing it, clip the weeds at ground level. If weeds grow taller than the grass, cut the entire area (no lower than 4 inches) with a string trimmer. You may need to do this once a month during the first year. However, at the end of the season, just before winter, it is best not to cut off the growth, which helps protect the young plants from extreme weather.


