
Garden Photography—Taking Great Plant Photos
I can't think of anything that I'd rather photograph more than plants—from larch trees and tulips to tomatoes and chard. Photographing plants and gardens and the people who grow them is my passion. I'm self-taught, and thanks to a lifetime of looking at plants and to the amazing community of photographic mentors that exists on the internet, I've made a go of garden photography. Here's a bit of what I've learned along the way.
Choose Digital
Digital cameras make it possible to practice to your heart's content without the expense of film and processing and the hassle of taking notes on what settings you used. While point-and-shoot cameras are getting better and better, an SLR (single-lens reflex) model with interchangeable lenses makes it possible for you to take your photography to the next level because you can control depth of field and light, the photographer's eternal quest.
There are many great and affordable digital SLRs (DSLRs) on the market. My advice is to ask friends what they like, visit websites like Digital Photography Review (dpreview.com), and get to know the staff at your local camera store. You may be able to rent before you buy—always a good idea to see which make and model suits you best.
Digital photography requires a certain level of comfort with a computer. You'll need to download your shots from the digital card, develop a system to store and retrieve them, and tweak them in a photo-editing program. Adobe Photoshop is the industry-standard editing program (and the most expensive), but there are several very good and less expensive ones, such as Google's Picasa, Apple's iPhoto, Microsoft's Vista, and Adobe's Lightroom and Photoshop Elements.
In digital format, you have a choice of modes to shoot in—JPEG or raw. Choose raw. In raw you can do your own processing, enabling you to correct things that are not correctable in JPEG, such as apparently blown-out highlights or deep, featureless shadows, and make artistic decisions according to your own vision. Raw files take up more room on your computer, but if you are serious about photography, it's the way to go. There are many online tutorials on working with raw files.
Timing Is Everything—in the Right Light
Photography is all about light. Most plant and garden photography is done in natural light. But a bright sunny day is not the time to take plant photos. Bright sun bleaches out color, blasts away detail, and creates harsh shadows. Best are overcast days, when the light is soft and diffuse, or those magic hours around dawn and dusk, when the light is golden and the sun's angle is low to the horizon.
If you find yourself shooting in bright sunlight, you can lessen the sun's harshness with diffuser panels, either bought or homemade. Photocopy paper, a white T-shirt, a plastic bag, even a bedsheet or shower curtain can make a serviceable homemade diffuser. There are plenty of DIY instructions on the internet for all sorts of photo and lighting accessories.
Conversely, if you are shooting in the shade, you can add light back in, either by reflecting—or bouncing—light off a white object, such as a board of white foam core, or with your camera's flash. If you must use the flash, diffuse it with a cover made for that purpose. On-camera flash is the least flattering of all options.
Some professional photo panels can serve as both diffuser and bounce card—and can also fill in as a windbreak. There's nothing more annoying than having your subject swaying in the breeze as you try to photograph it.

Before You Click:
- Explore your options. Don't shoot from just one place. Look at the scene from different vantage points and don't be satisfied with your first assumption. Often moving a foot in any direction will make the difference between an award-winning photo and a deleted shot.
- Eliminate distractions. Depending on the garden, the type of plant, and the intended use of the photo, I may do a bit of cleanup—I carry a pair of shears, a hand weeder, and a whisk broom to tidy the shot if it's called for. But use discretion if it's not your garden—and ask the gardener first.
- Hold your camera very still—or better yet, use a tripod. Tripods can be clunky, heavy, and annoying, but using one will give you more time to compose your shot. The images will be sharper and your horizon lines will be straighter.
Composing the Picture
There are certain photographic design principles that are useful to learn—but be flexible enough to break them if you have a good reason.
- The rule of thirds Imagine the viewfinder as a tic-tac-toe board, divided by three boxes across and down. Place the strongest elements of the image at the intersections of those lines, rather than plunking the subject in the middle of the frame. This creates a more dynamic composition and moves the viewer's eye around the picture. For this same reason, don't bisect the photo with your horizon line. Place it above or below the midline.
- Positive and negative space Positive space is the area occupied by the main subject of the work; negative space is the area around the positive space. Balance areas of greatest activity or number of elements with areas of little or no activity. This gives the eye somewhere to rest. It also creates tension and emphasis, reinforcing your focal point.
- Simplicity If an element doesn't have a purpose in your composition, it detracts from the subject. Move in close and fill the frame with your subject, leaving out inconsequential details.
- Light and dark Light advances and dark recedes. Similarly, warm colors advance, grabbing your attention; cool colors recede and are restful to the eye.
- Depth of field Depth of field refers to how much of the photo is in focus and the plane at which that takes place. By limiting the depth of field, you emphasize the main focal point.
- Foreground, middle ground, and background The camera only sees in two dimensions—height and width—which makes for a pretty flat picture. To help create a sense of depth, look for elements that reinforce a foreground and background to your subject in the middle ground. In a landscape photo, a well-placed leafy branch in the foreground, framing the subject in the middle ground, will do nicely. The same goes for a background element—something to create that sense of depth. An arbor, fence, gazebo, or another plant can do this—as long as it is not stronger than the actual subject. Photographers use depth of field to blur distracting elements, placing the emphasis on the subject.
Through a Glass, Brightly: Lenses
The lens is the most important part of the camera, and its quality can make all the difference between a great photo and a mediocre one, so don't skimp—buy the best glass you can afford.
Lenses come in two types: fixed focal length (prime) lenses and zoom lenses. Primes are generally considered to be sharper than zooms, but the difference is lessening as technology improves. Sharpness isn't everything, but it can make a big difference in image quality. The advantage of zooms, which I prefer, is that they are more versatile and give you more control over the composition, allowing you to explore and quickly adjust focal range. You also don't have to change the lens as often as you do with primes, thereby subjecting the camera to fewer sensor dustñcollecting opportunities.
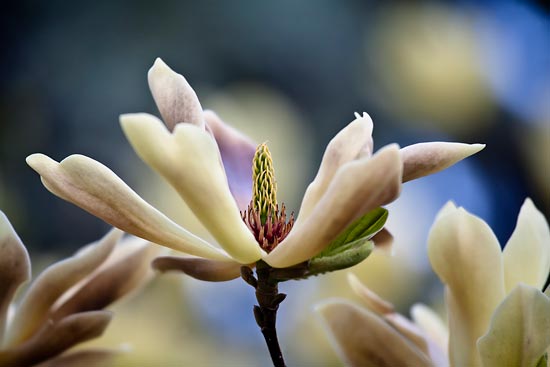
Macro lenses are great for nature photography, magnifying what is not easily seen with the eye, like the veins of a leaf or pollen grains. Many botanical photographers only shoot macro. It requires practice, patience, and a tripod and a shutter release cable, because the slightest movement will mean a worthless shot.
Back at the Ranch
So now you have a full 4 GB (gigabytes) of raw photo files. Time to download them onto your computer and marvel at your wonderful shots. After a quick viewing, though, you should immediately catalog your photos so you can find them again—by general subject, plant name (scientific and common names), location, and date. Give each image a name other than the one the camera gives it; otherwise you'll wind up with many photos called IMG_0001!
There are programs, books, and websites devoted to the process of cataloging all this information, called digital asset management (DAM). I use Expression Media, which allows me to catalog, rename (by batch or singly), caption, and keyword my photos. It also has the capacity to note location; apply a rating system; and imbed my name, contact information, copyright, job number, and usage terms. I can create a PDF contact sheet; resize the photos for emailing; and make a backup DVD.
When editing, never work on the original but rather create a copy and leave the original file as it came out of your camera. I create these edited photos as TIFFs and store them separately from the raw image files. If I'm printing, I keep them at a resolution of 300 dpi (pixels or dots per inch). If posting to my website or emailing to friends, I change them to 72 dpi, which is the resolution that a computer screen displays.
Recommended Websites
Flower and Garden Photographers
Clive Nichols: clivenichols.com
Michael Brown: macroartinnature.wordpress.com
John Glover: johnglover.co.uk
Photography Resources
The Luminous Landscape: Equipment reviews and a good forum (luminous-landscape.com)
Digital Photography Review: Good site for camera reviews and sample images (dpreview.com)
Better Photo: Community of photographers at all levels, plus excellent online courses (www.betterphoto.com)
Strobist: Off-camera lighting with small strobes (strobist.blogspot.com)
Scott Kelby's Photoshop Insider: News and tips about Adobe Photoshop (www.scottkelby.com)
Tim Grey: Color management and printing (timgrey.com)
The DAM Book: Creating and managing digital photography files (digital asset management) (www.thedambook.com)
Photography tutorials:
Search "photography" on youtube.com and you'll find dozens of useful video tutorials.
Your Vision
Whether you shoot for publication or your own pleasure, for a botanical record or fine art prints, have fun and enjoy the act of capturing the vitality and beauty of the natural world. Honor nature by creating the most beautiful photograph you can.